Expand an item below for instructions on accessing shared resources in Outlook 2016 (click an image to enlarge it).
Creating Calendar Events
To create a calendar entry in Outlook 2016:
- Open Outlook
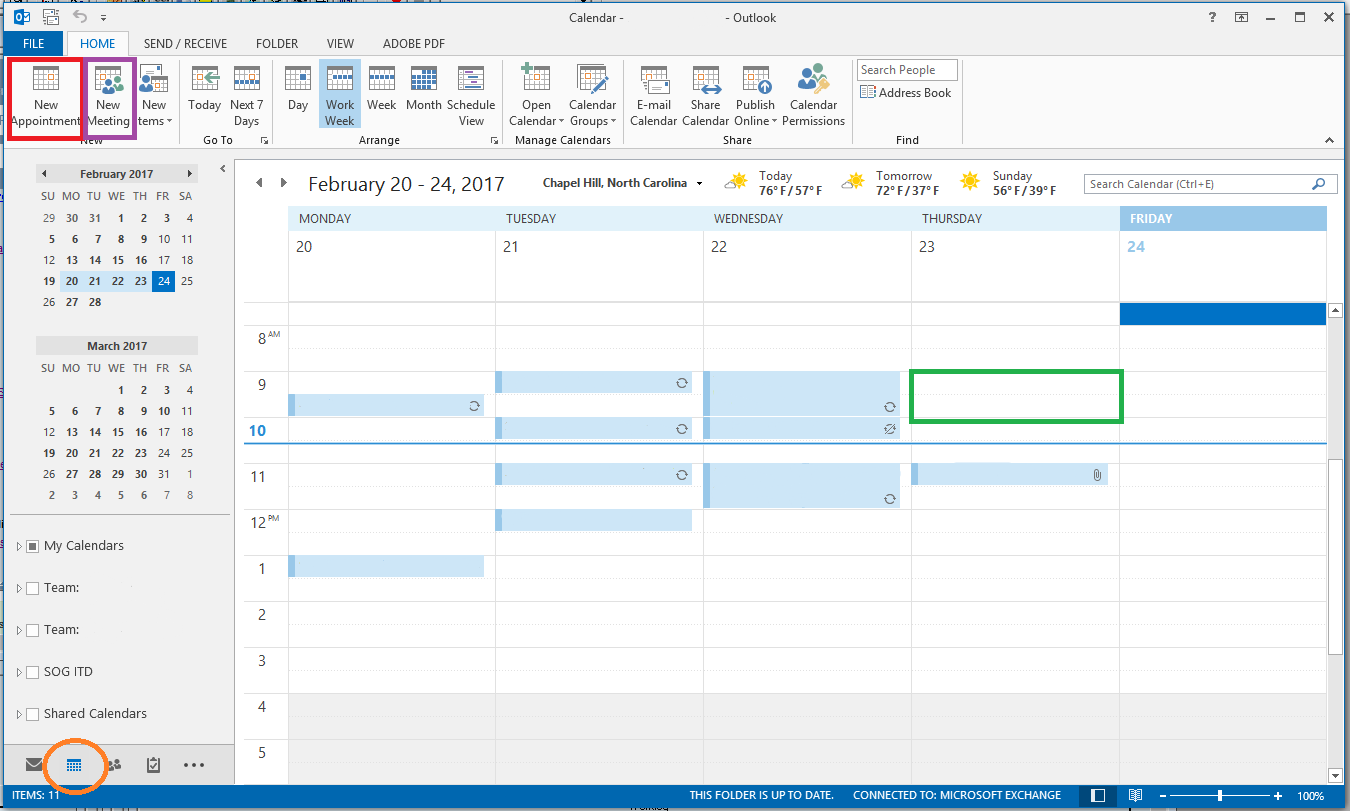
- In the bottom left of the Outlook application, select the Calendar icon (circled in orange in the image below).
- Once your calendar is open, you can create an entry two ways (If you have multiple calendars open, it is important that you be sure you are tabbed onto your own calendar before completing the below steps):
- Find the date and timeslot during which you wish to schedule a meeting and double click the selected box (denoted by a green box below).
- Find the date and timeslot during which you wish to schedule a meeting, select it with a single left click on your mouse, and then select either "New Appointment" or "New Meeting" from the top left area of your Outlook application (denoted with red and purple boxes below). Appointments are events such as doctor appointments, blocks of time during which you wish to research, or any other personal event that does not include other people. Meetings are similar to appointments, differing in that they allow for inviting other people to the event.
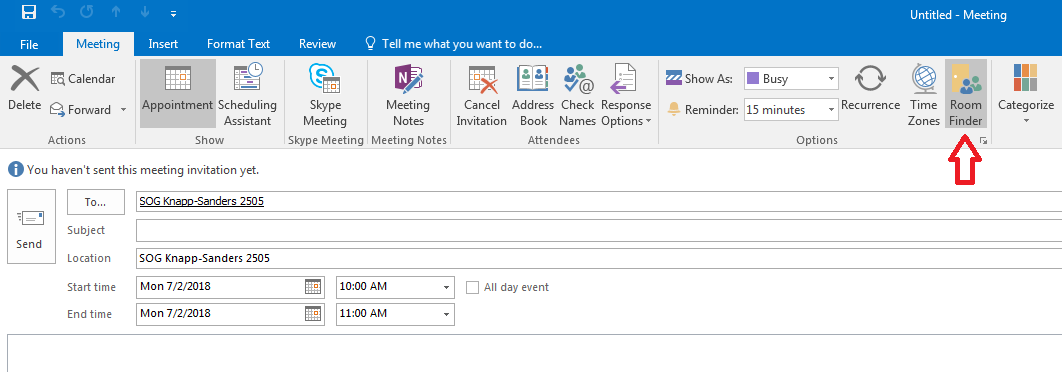
Once you have completed step 3, a new window will open (screenshot below). This window will allow you to add Subject, Location, Start and End times, as well as change preferences like adding recurrences, Privatizing the event (if you click on the PRIVATE lock icon in the settings ribbon, this will make it so that only you can see the details of your event).
Unless you have chosen a specific time slot on your calendar (denoted in green above), the date will automatically populate as today's date and the time will populate as the next half hour. Adjust as needed for your meeting. You can also use Scheduling Assistant to determine the availability of other meeting attendees and set the date and time accordingly.
- Using the Room Finder
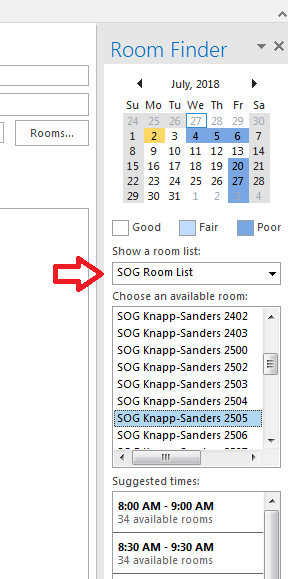
The “Room Finder” will pop up on the right side of the screen. Click on “SOG Room List” from the “Show a room list” drop-down menu. All available rooms for the meeting time you have selected will appear. Click on the room you would like to reserve, and it will appear in the “To” field of your meeting request. There are suggested times and available rooms listed below should you need to consider alternative options.
Note: If you want to reserve a specific room, you can also invite it to your meeting as you would other meeting attendees and include it when using Scheduling Assistant to determine availability. All rooms are available in the Global Address List and begin with “SOG Knapp-Sanders…”.
- Click "Send".
- If you have selected a classroom that requires approval (2601, 2603, 2401, 2402, 2403, or 2321), it will first need to be approved by a member of the Registration and Client Services team. Once it has been approved, you will receive a notification that your reservation has been accepted.
- If you have selected any other meeting room or event space, it will be reserved automatically. You will receive a notification that your reservation has been accepted.
Outlook for Mac instructions coming soon.
Office 365 Web App instructions coming soon.