Using Rules in Outlook
You can use rules in Outlook to help you organize your e-mail by specifiying what to do with messages that meet certain criteria. Please click images to enlarge.
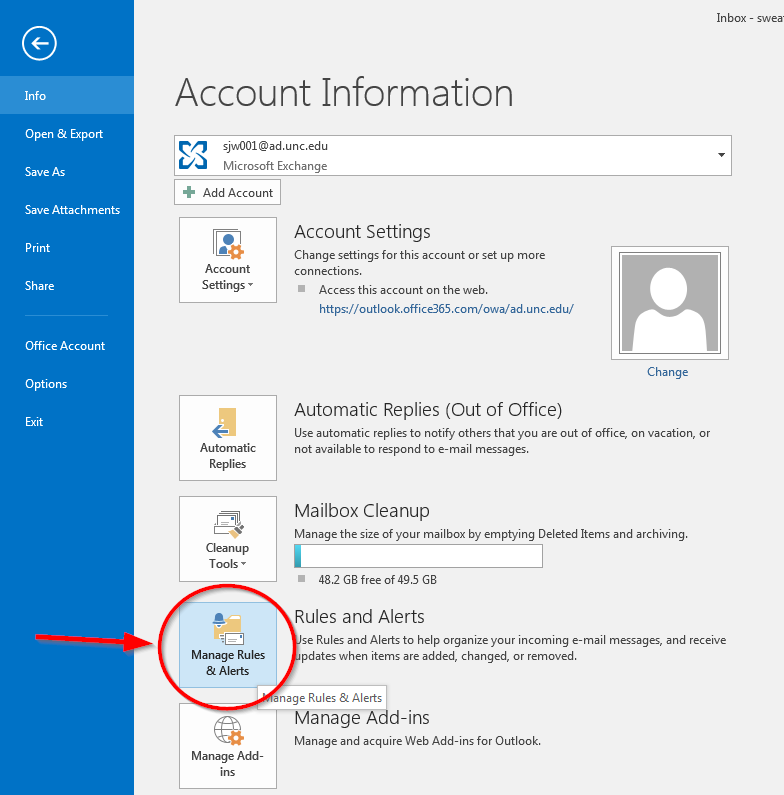
- In Outlook, click the "File" tab.

- Click the "Manage Rules & Alerts" button.
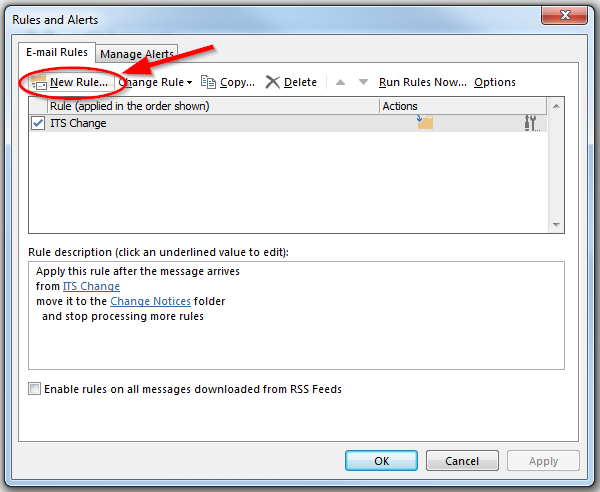
- Now you see the rules window, which will list any rules you have. From here, you can create a rule by clicking "New Rule...," edit an existing rule with "Change Rule," copy rules, delete rules, and apply rules to existing messages with "Run Rules Now..." Under the list of rules is a box that contains a description of the selected rule (the criteria to which the rule applies and the action it takes). For this example, we will create a new rule by clicking "New Rule..."
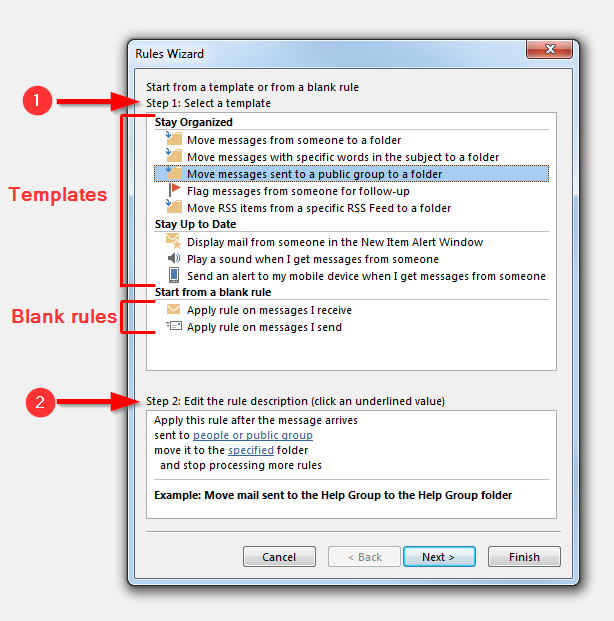
- The next window has rule templates and blank rules you can choose from, and the details of the one you choose will be shown in the description box below. Here, we will create a rule to automatically move any messages sent to the SOG Daily List e-mail distribution group to a Daily List folder I've created. For this, choose the "Move messages sent to a public group to a folder" template, then look at the description at the bottom.
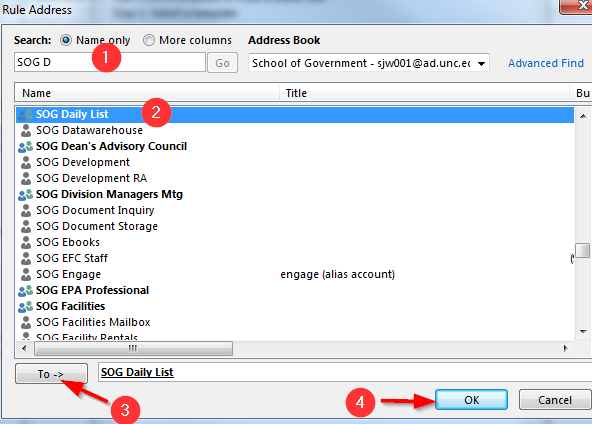
 The underlined parts are the parts you need to change, here the public group a message was sent to and the folder to which to move it. First, click "people or public group" and use the tool to search for the group, here "SOG Daily List."
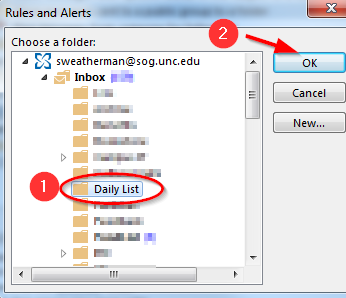
 Next, click "specified" and choose the folder in which you want the messages to be placed.
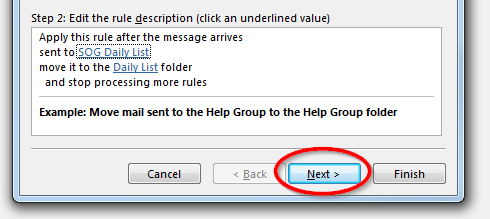
- Now the description portion of the window will show the selections you've made. Click "Next."
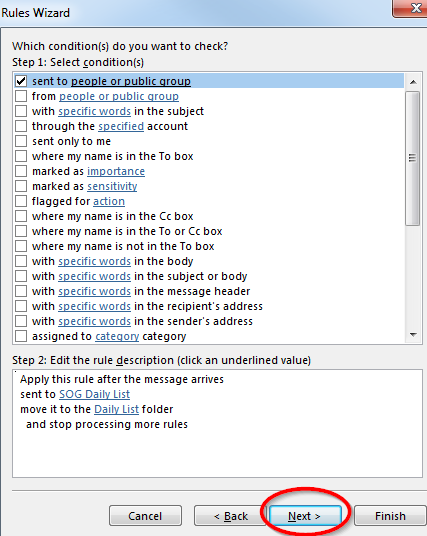
- If you only want this rule to apply to messages with the condition you've already set (in this example, messages sent to the Daily List), then just click "Next." If you wish, in this step you can add additional conditions (such as specific words included in the subject) to your rule by clicking the checkbox next to them, then clicking "Next."
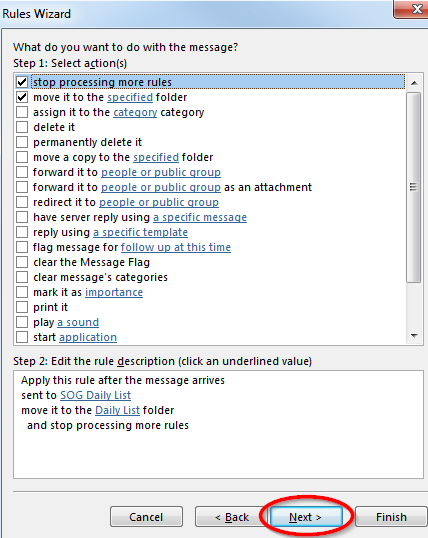
- Similarly, if you only want to take one action (like moving messages to a folder), you can click "Next" here (this is really one action in addition to "stop processing more rules," which will already be checked and which you should leave checked). If you want, you can add other actions to the rule (such as forward it to a person or group) by clicking the checkbox next to them, then clicking "Next."
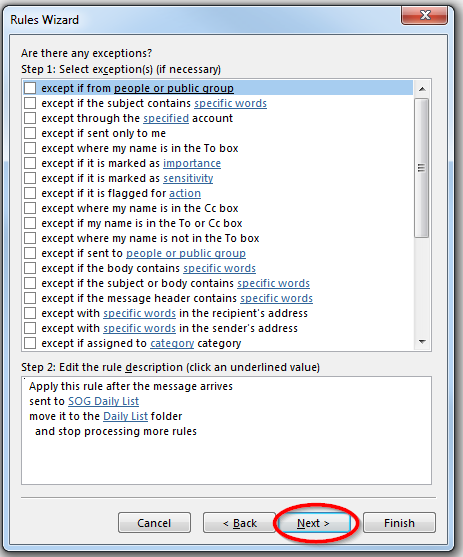
- This window is a chance for you to add exceptions to your rule, if desired. You are not required to add any exceptions, and we won't add any in this example. Click "Next."
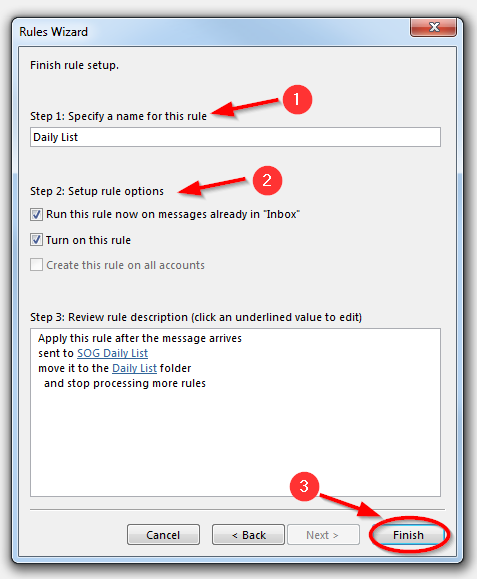
Now, in step 1 here, you can name your rule. Outlook will generate a name for it, which you can keep or change to a name that works better for you.
In step 2, you set the rule options. If you want the rule to apply only to messages you receive from now on, then leave "Run this rule now on messages already in 'Inbox'" unchecked (depending on the rule you are creating, the folder might be something other than "Inbox"). If you want the rule to be applied to messages already in your inbox, then check that box. "Turn on this rule" should already be checked, and you should leave it checked. "Create this rule on all accounts" will probably be grayed out because it does not apply; there is no need to worry about this.
Now click "Finish."
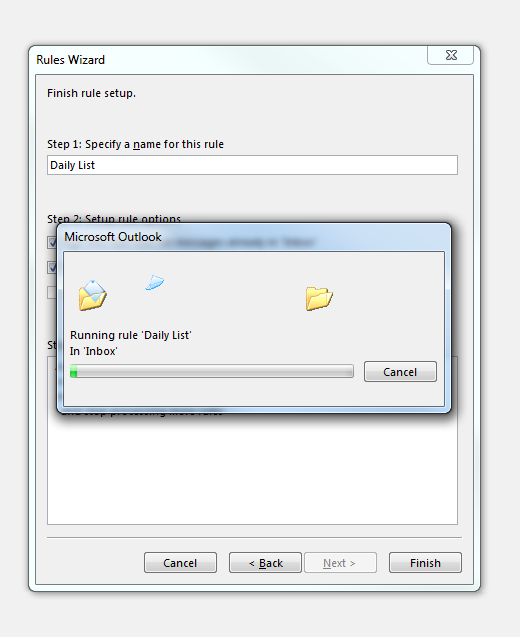
- If you apply the rule to messages already in your inbox, you will see something like this while it runs.
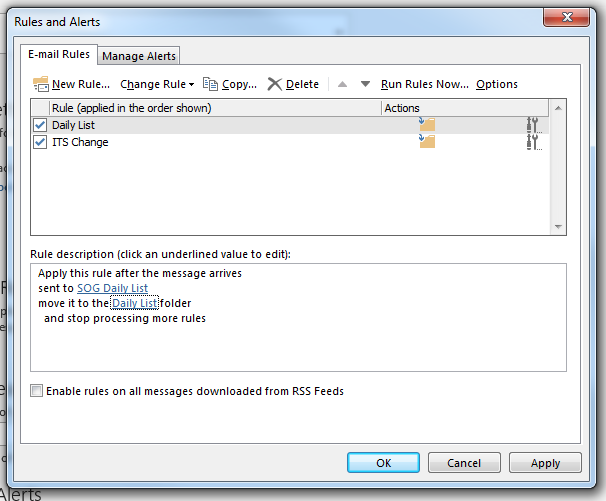
- You are finished creating your rule, and you will now see it in your list of rules. If you have more rules to create or edit, click "Apply." If you are done creating or editing rules, click "OK."
