- First, go to heelmail.unc.edu and log into your account using your Onyen and password.
- Go to your calendar and click New Event at the top right.
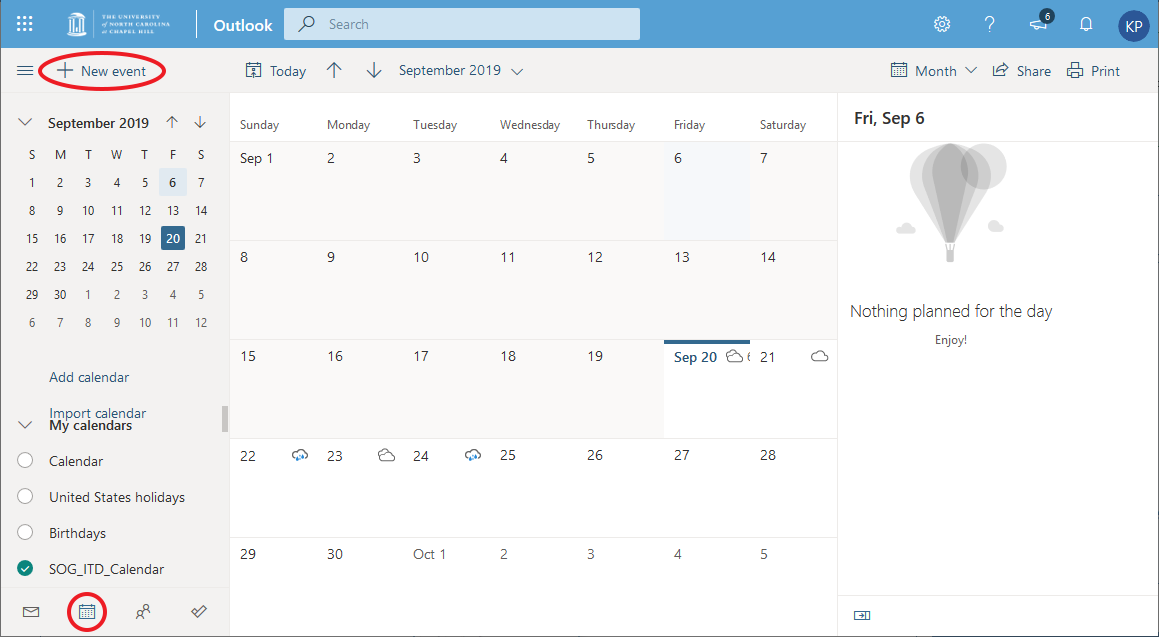
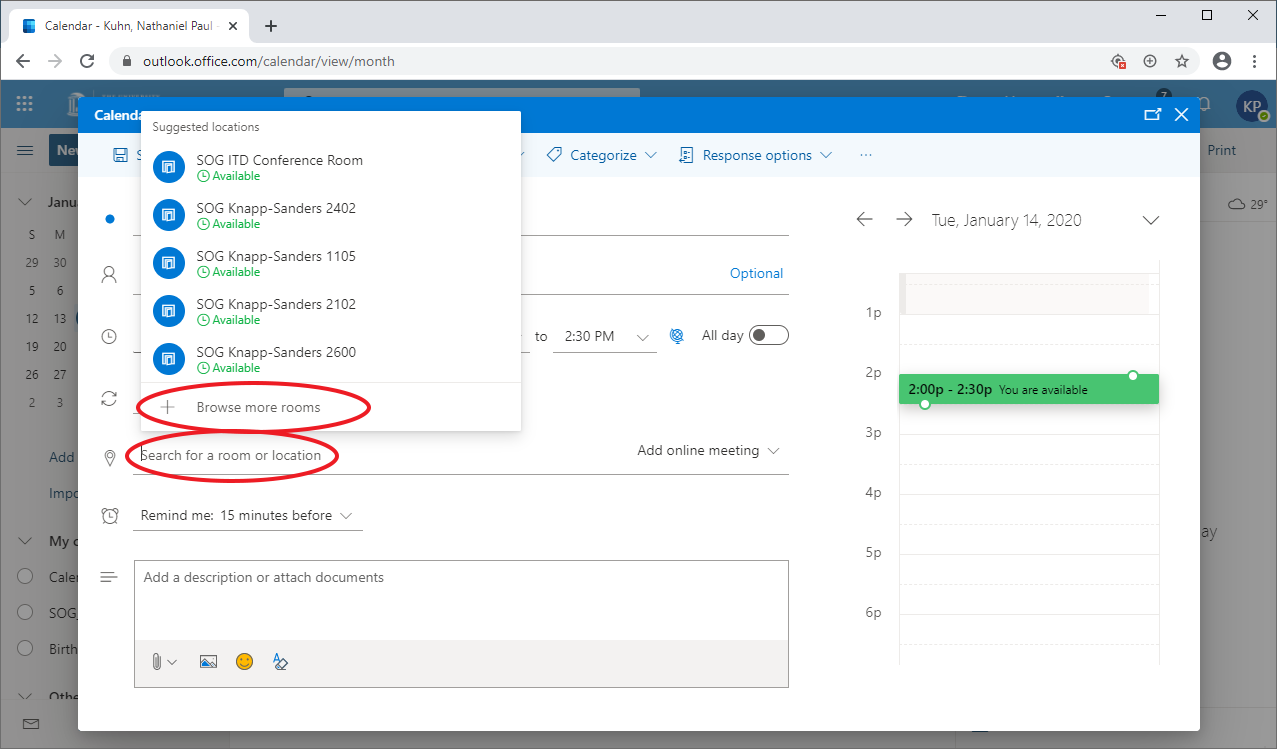
- To select a room, click in the box labeled "Search for a room or location," then click "Browse more rooms."
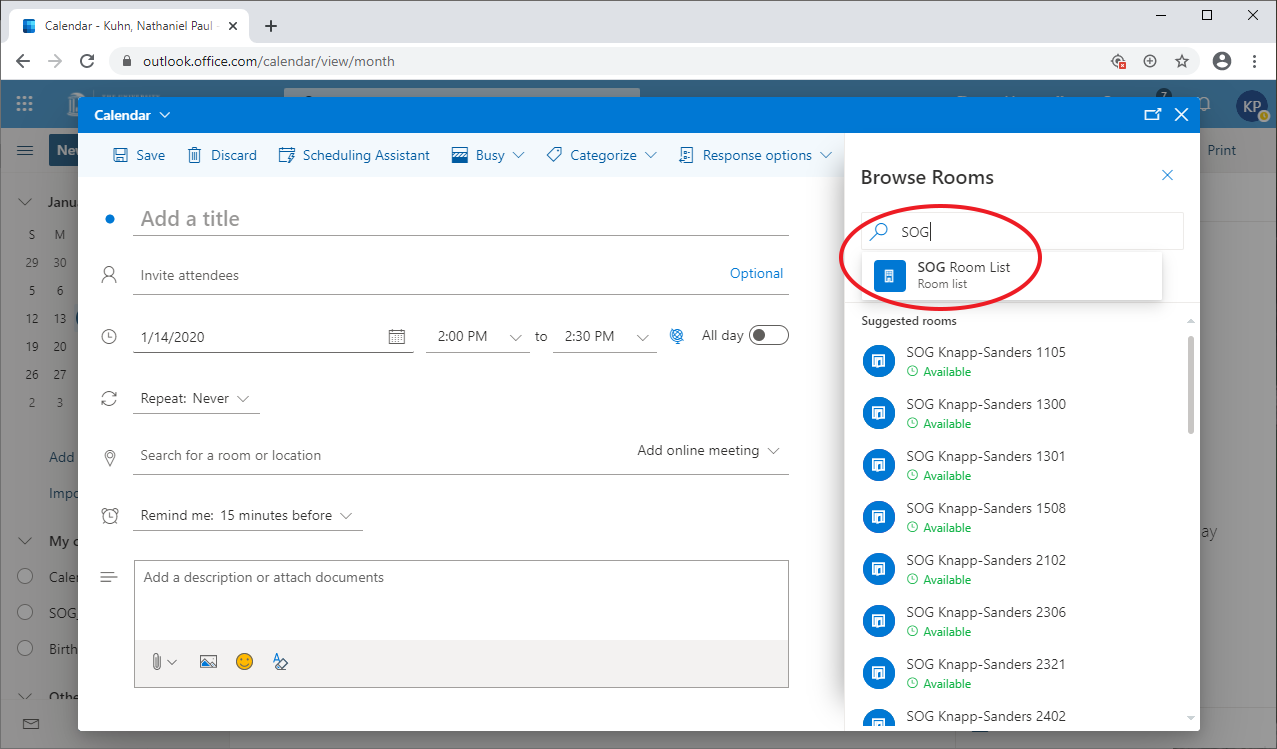
- Search for "SOG Room List." This will show you a list of all School of Government rooms available for the time you have selected. If you change the start and end time of your meeting, this list will update. When you select a room from this list, the location field of your meeting will be set to that room.
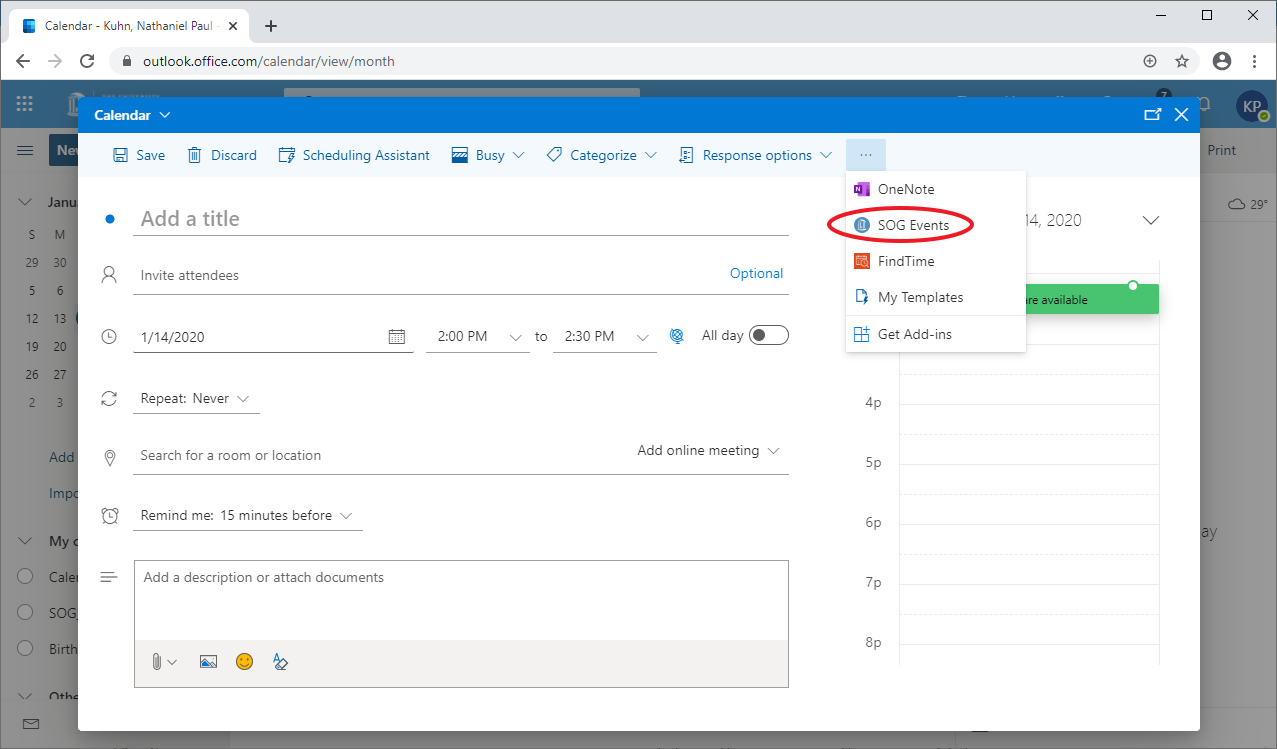
- When you have selected your room, click the elipsis at the end of the top row of options, then click "SOG Events Tool." This will open another panel on the right side of the window.
- If you don't see the SOG Events Tool, click here for instructions to install it. (You can skip to step 3 in that article.)
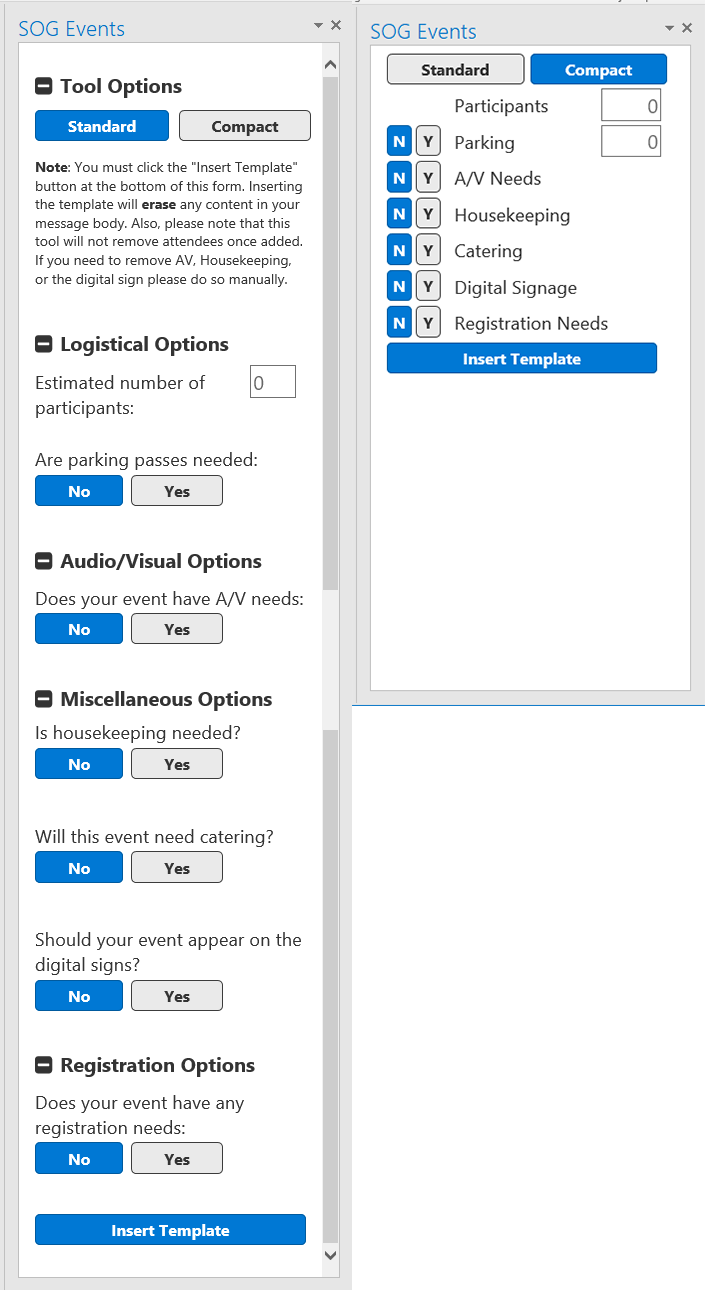
- At the top of this panel, you can select "Standard" or "Compact" view. Standard view gives you more information, while Compact is more concise.
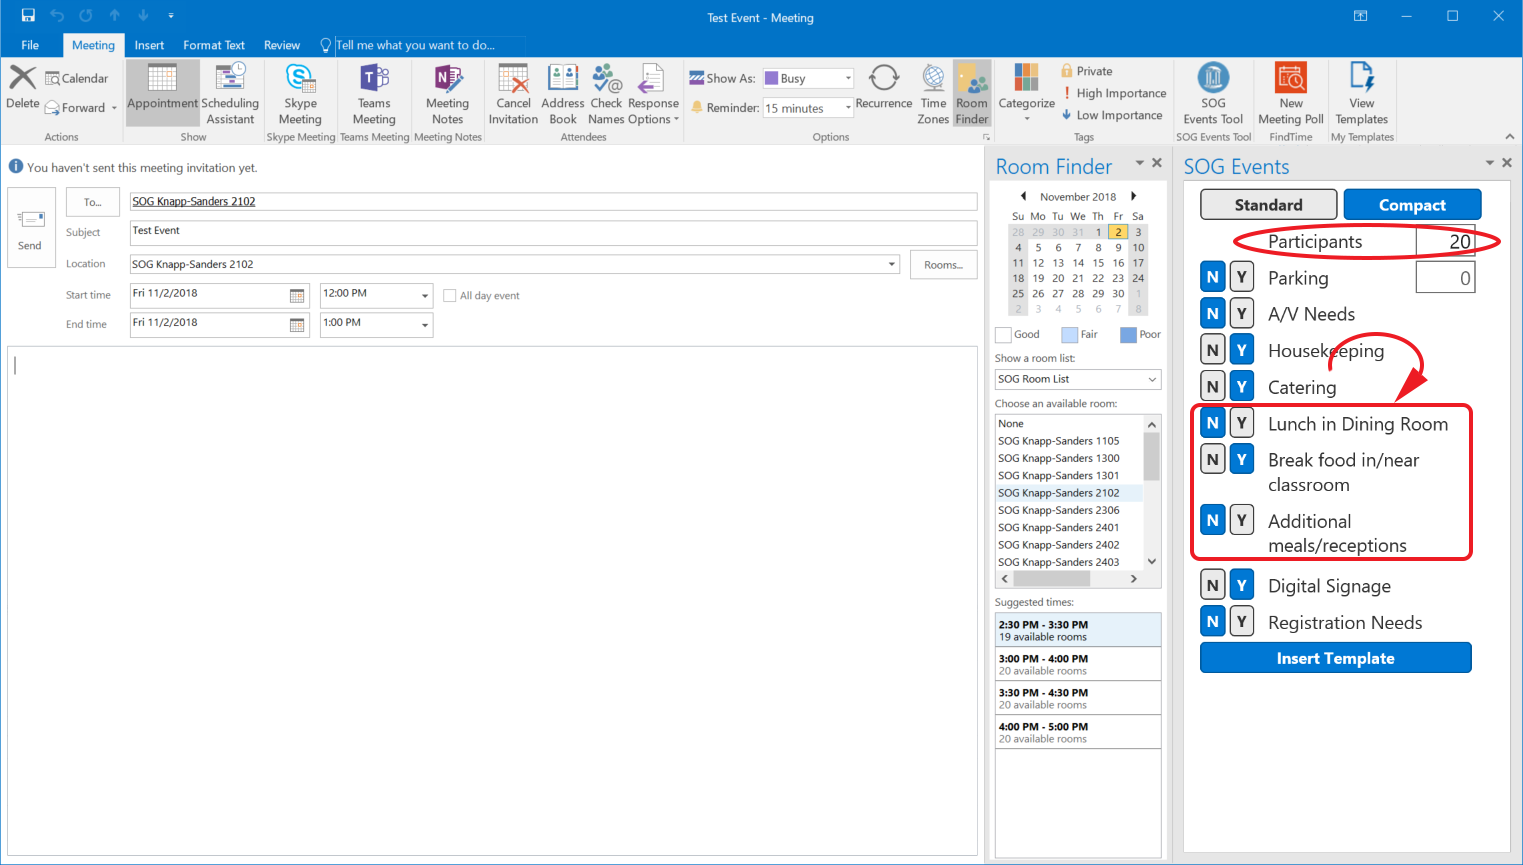
- Enter your expected number of participants, then select yes for each service you will require. Selecting yes on some options will cause related options to appear.
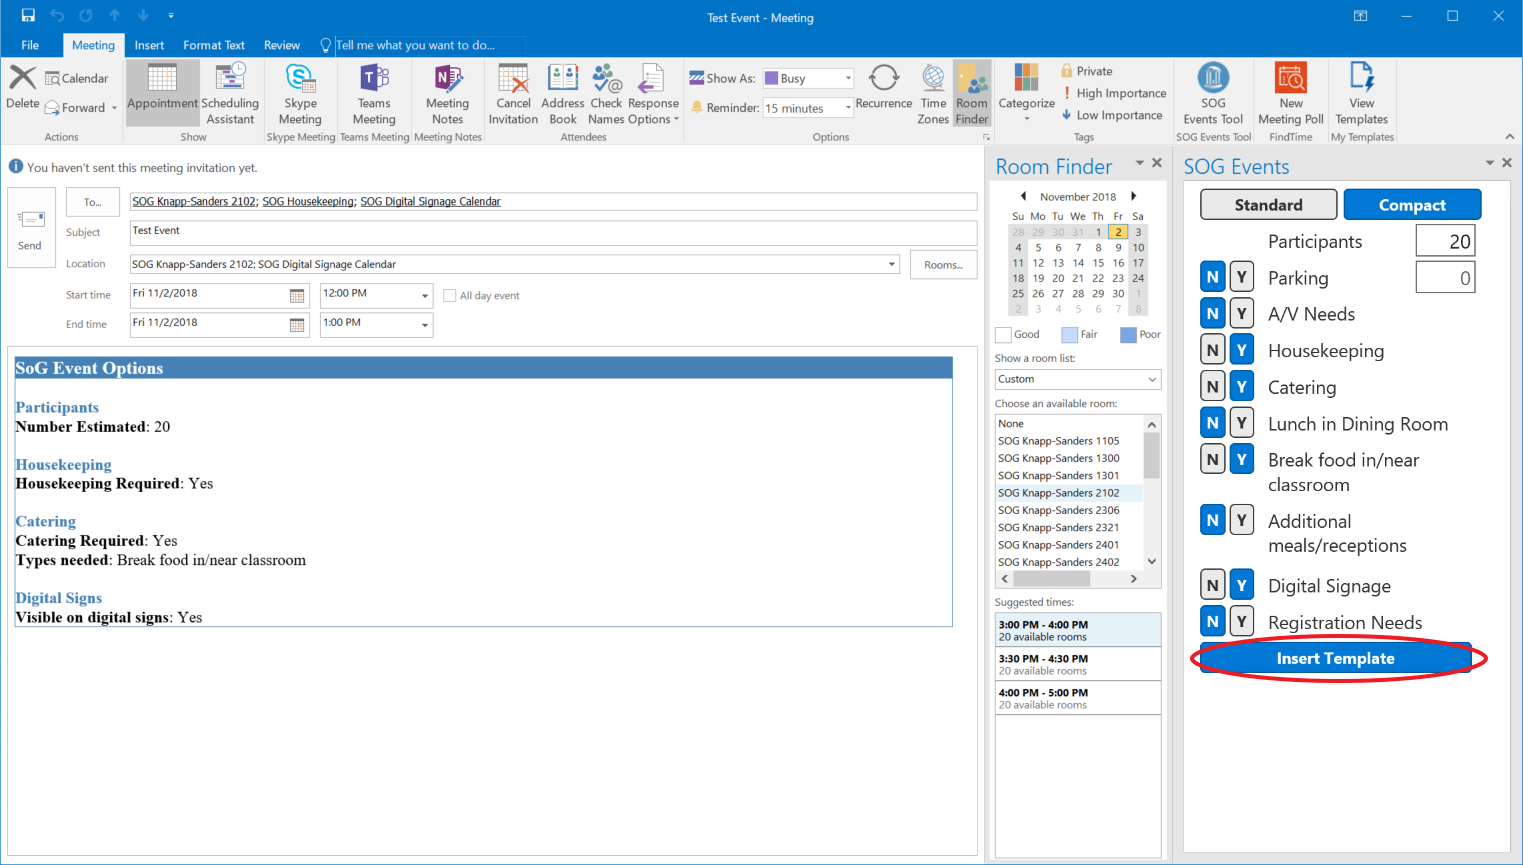
- When you have made your selections, click "Insert Template" and the bottom of the panel. This will insert the relevant information into the body of your meeting invitation and add the relevant parties to the invite list. Note that if you later edit the event using the tool, you will have to re-enter the existing information into the tool, as clicking "Insert Template" replaces the body of the event.
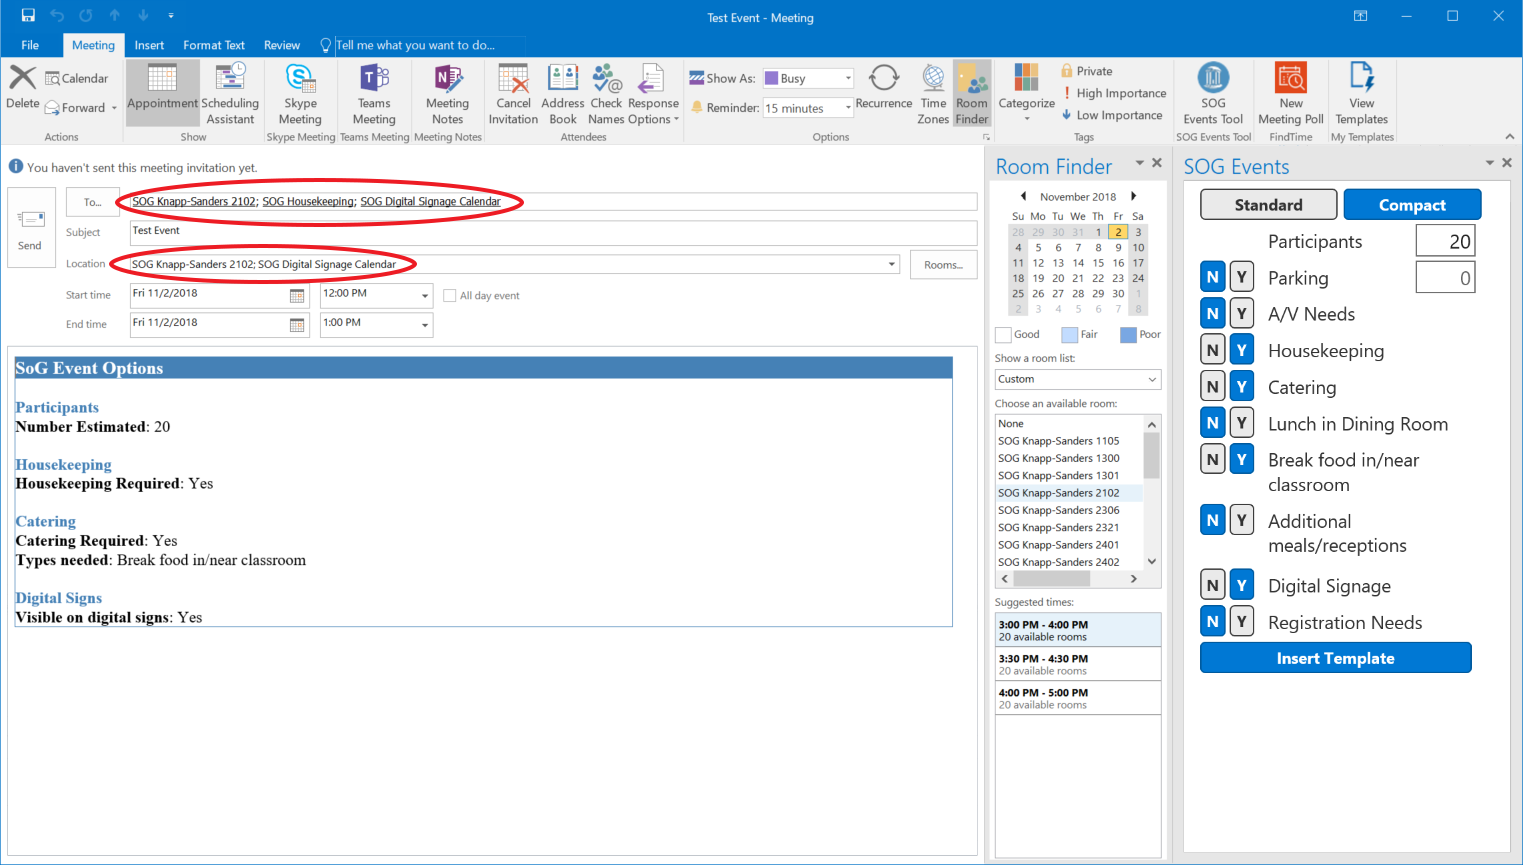
- When you click send, a room reservation request will be created and the event information will be sent to whichever services (housekeeping, catering, etc.) you've requested in the form.
Creating an Event in Outlook
This guide will take you through the process of creating an event in Outlook using the SOG Events Tool and Room Finder.
The room finder locates an available room for your event and reserves the room, and the events tool displays a list of services that can be requested, then sends notifications to the parties responsible for whichever services you select.
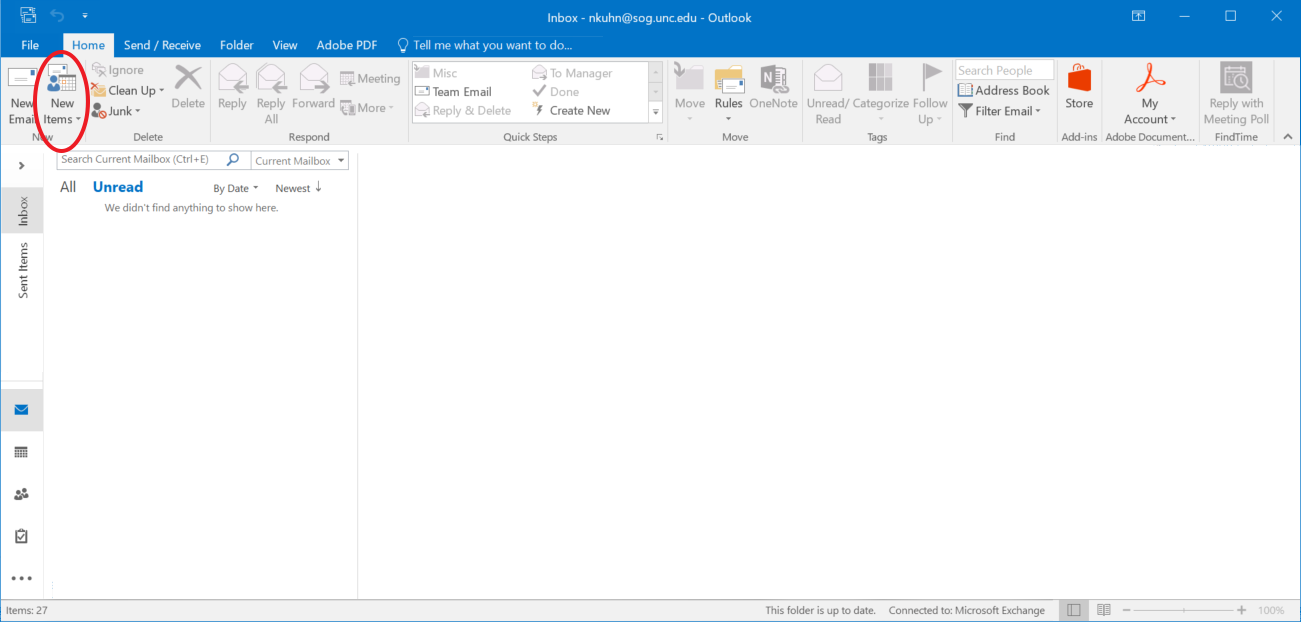
- Begin by opening the Outlook desktop client. Click "New Items" in the top left corner of your screen. From the drop down menu that appears, click "Meeting."
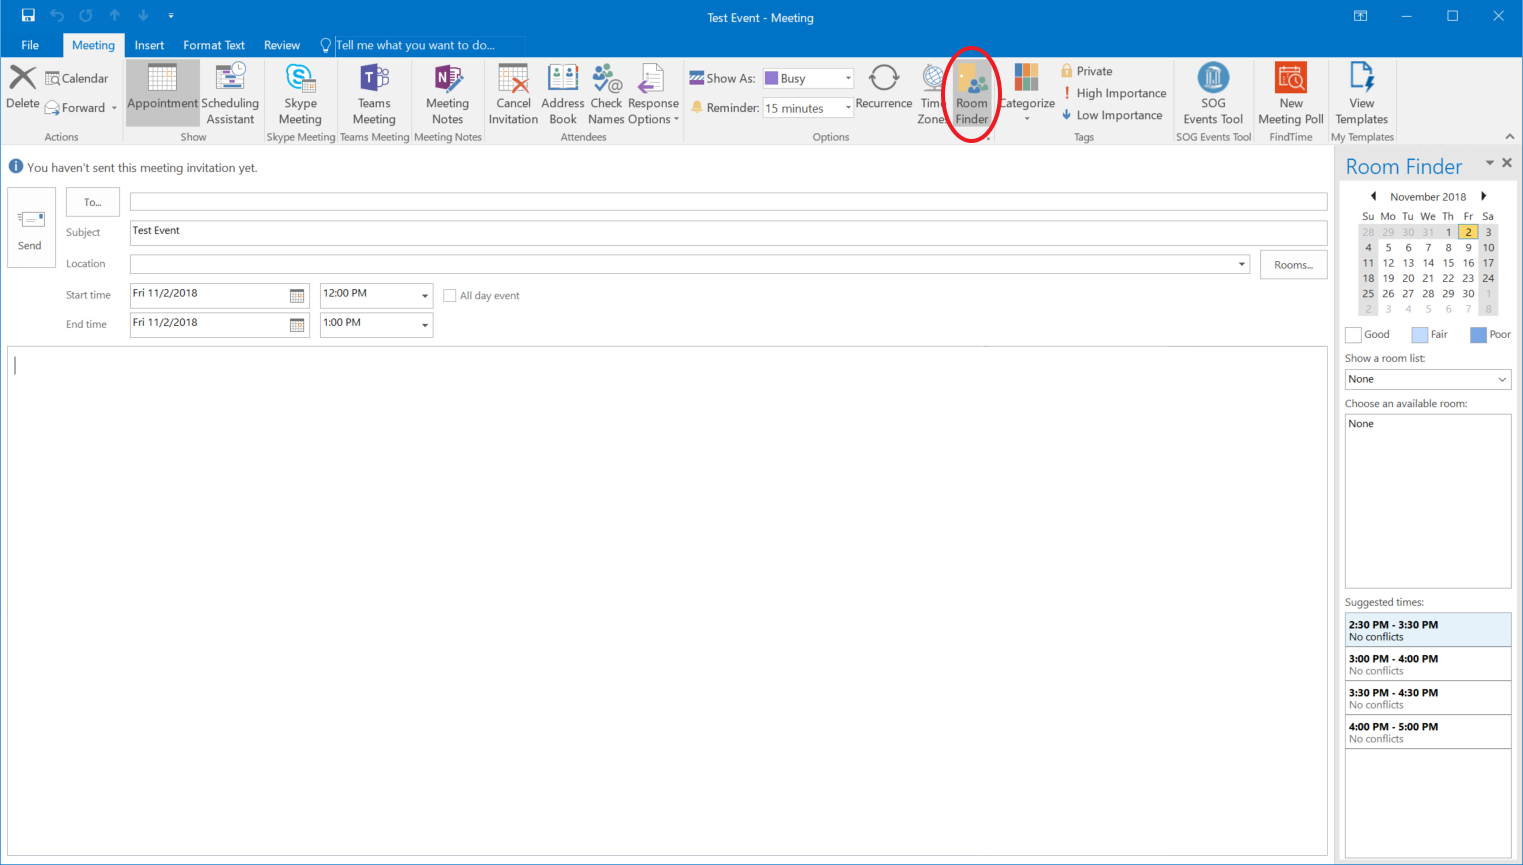
- A new window will open. The Room Finder button will be on the right side of the window next to the Location field. (On Mac, it will be in the row of buttons at the top of the window.) This will open the Room Finder panel on the right side of the window.
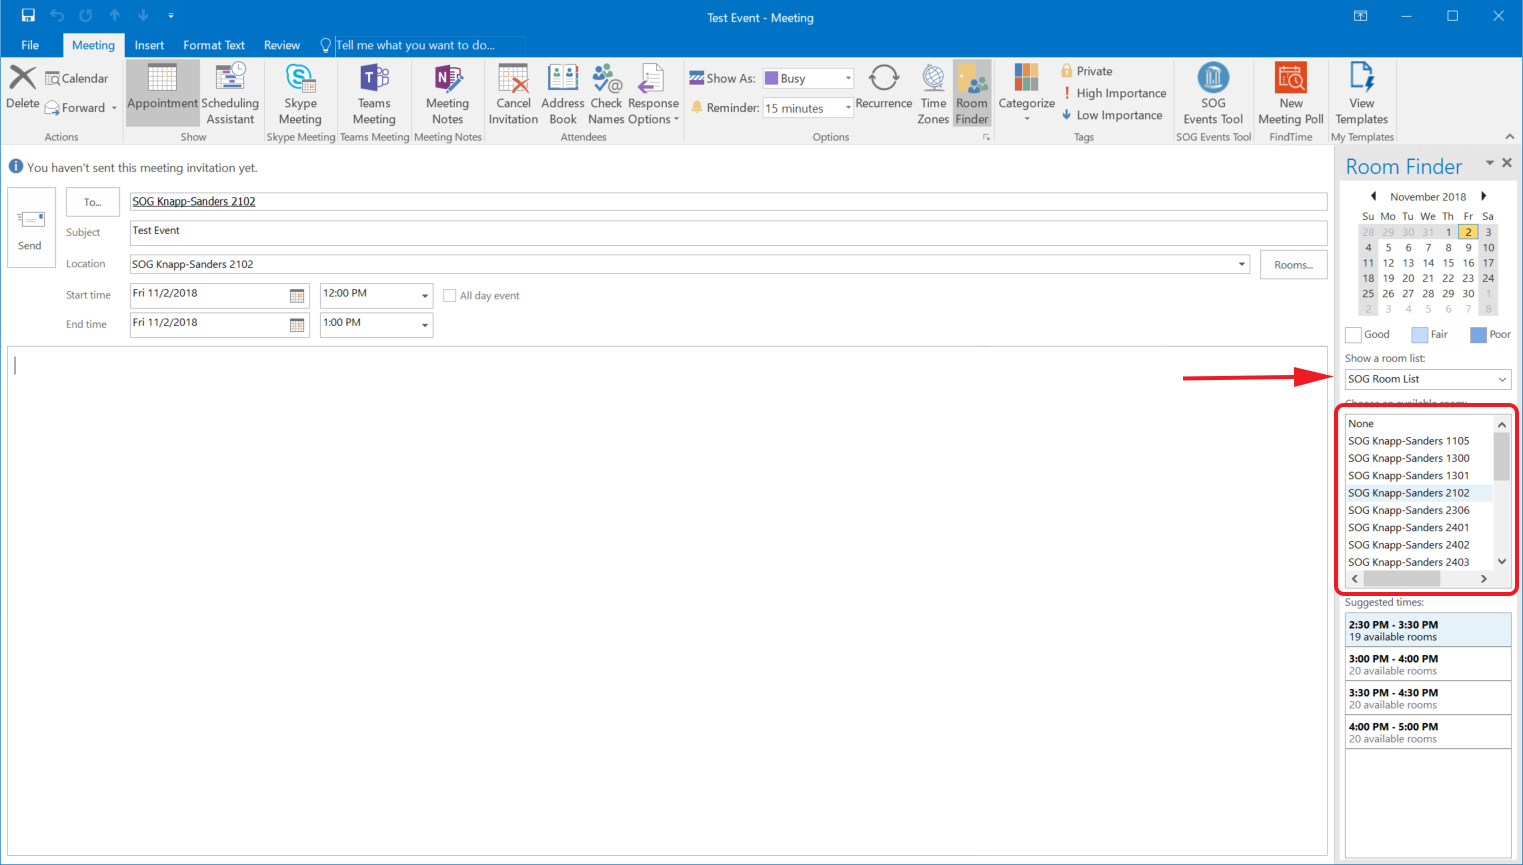
- Under "Show a room list:" select "SOG Room List." This will show you a list of all School of Government rooms available for the time you have selected. If you change the start and end time of your meeting, this list will update. When you select a room from this list, the location field of your meeting will be set to that room.
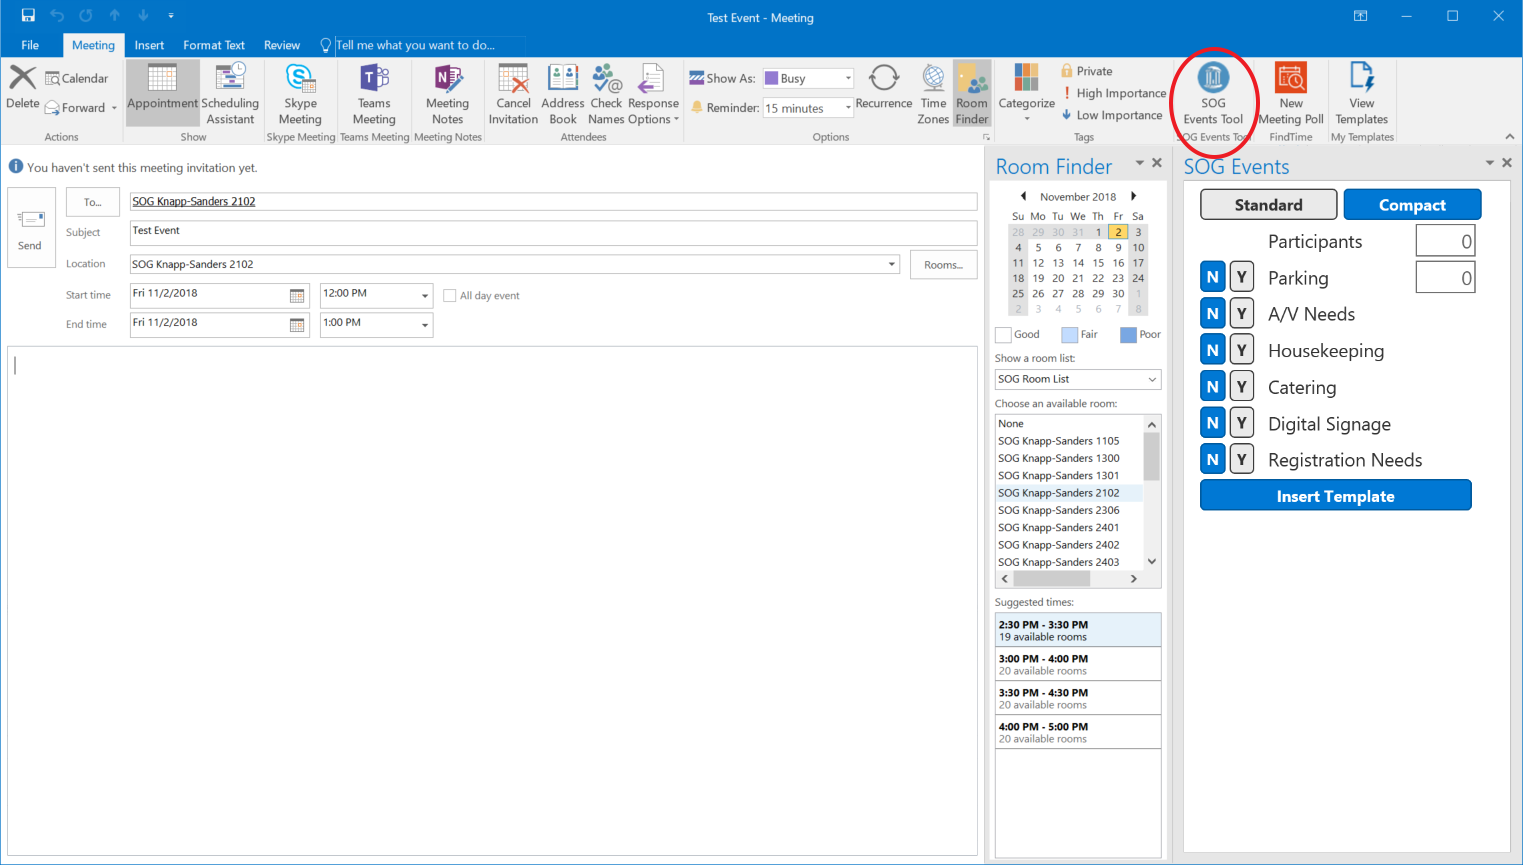
- In the top right corner of the window, click "SOG Events Tool." (You may have to scroll to the end of the row of buttons.) This will open another panel on the right side of the window.
- If you don't see the SOG Events Tool, click here for instructions to install it.
- At the top of this panel, you can select "Standard" or "Compact" view. Standard view gives you more information, while Compact is more concise.

- Enter your expected number of participants, then select yes for each service you will require. Selecting yes on some options will cause related options to appear.

- When you have made your selections, click "Insert Template" at the bottom of the panel. This will insert the relevant information into the body of your meeting invitation and add the relevant parties to the invite list. Note that if you later edit the event using the tool, you will have to re-enter the existing information into the tool, as clicking "Insert Template" replaces the body of the event.

- When you click send, a room reservation request will be created and the event information will be sent to whichever services (housekeeping, catering, etc.) you've requested in the form.
 If you need to update the event after you've sent the initial invitation, but you don't want an email notification to be sent out, you can click the save icon in the top left corner of the window. Note that this option is currently only available in the Windows version.
 - When you're finished, if you need to print the information on what was requested, just press Ctrl-P (or Command-P on Mac) to print the email.
